Live Chat
Super-Bright LED Turn Signals Installation Tips + Safety Information
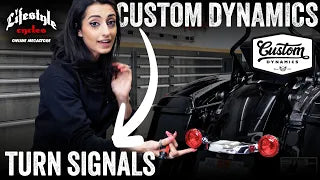
Stay tuned, guys! Today I'm going to teach you how to install the Custom Dynamics ProBEAM turn signals on the front and back of your Street Glide.
Before we dive into opening these things, a couple of cool things I wanted to share with you guys. For starters, these are LED—they’re significantly brighter than your stock Harley lights and turn signals, which is great because cars will actually see you out on the road at night. They also come with a lifetime warranty, and best of all, regardless of how bright they are, they are DOT approved. So no hassle or worry about getting in trouble with the cops or anything like that. You're out there riding safer—and legally. What's better than that?
They're also so easy to install. All you literally need is a flathead screwdriver. That’s it. I have no other tools!
As you guys know, it’s time to get dirty—but today, I’m getting dirty by myself. Before we dive into getting these installed, I want to show you guys what the stock Harley-Davidson Street Glide turn signals look like. You’ve got your right side, and you’ve got your left side—not too bright. And here’s what the brake lights look like.
A super cool thing about these lights—before we dive into it—is that they’re not only a do-it-at-home, super easy customization, but they also come with easy-to-follow instructions, so you can do it all yourself.
Let’s dive right into it. First thing we’re going to do is take your flathead. Be careful—don’t scratch anything—but we’re going to use the flathead to find the little indented groove on the plastic cover. Set that aside.
Next, you have your bulb. Super easy—you’re going to turn it, and the bulb comes right out. I suggest keeping your bulb in case you ever want to go back to your stock lights—it’s a good thing to have lying around.
Now we’re going to dive into our lights. Prior to putting these in, on the other side of the plug mechanism there’s a small slot. That’s where you’ll use the flathead—turn it clockwise to lock it into the bike.
This is going to be two pieces, just like the original orange lens I took off. You’re going to have a slightly smoked lens—set that aside for now. Take your light and plug it right back into where you removed your bulb.
The best way to do this—because it's kind of hard to get your hand in there—is to use the flathead. Be very careful. You don’t need extreme strength, just enough to gently press it in. Give it a tiny tug to make sure it’s secure—not too hard, or you might tear wires.
My suggestion: before you insert the light into the housing, organize your wires so they’re not being pinched or tugged. Give them a little twist to keep everything neat, then go ahead and insert the turn signal.
Now grab your smoked lens and pop it right over the light. Just line it up and give it a little muscle—but not too much! You don’t want to break anything. And there you have it.
Now, repeat the exact same process on the other side: remove the shield, remove the bulb, insert the new turn signal, plug it in, organize your wires, and pop the smoked cover on.
Now on to the rear turn signals, guys. Again—super easy. Custom Dynamics makes this so simple to do at home.
You’re going to go through the same exact process. Find the little slit at the bottom where you can insert your flathead. Don’t just scratch around—look for the tab. Insert your flathead and pop it right off.
Pro tip: instead of trying to force it off, give it a little twist—it’ll come right off for you.
That’s it, guys! With just a few simple steps and a flathead screwdriver, we just got our turn signals installed. Now let’s turn them on and make sure they work.
Guys, these turn signals look amazing. They instantly elevated the look of the bike, and I’m so stoked for you to get a pair on your own ride. A few easy steps to customize and personalize your bike—and not just that—it’s making you safer on the road. Other cars and bikers will see you, and you're riding legally because they’re DOT approved.
So if you’re intrigued and want to get a set for your bike, check out the Lifestyle Cycles online mega store. Get free shipping for purchases over $50 and 5% back in Mega Bucks toward your future purchases.
Wait—don’t go anywhere until you like and subscribe to make sure you get notified every time we post our how-to videos, product reviews, and all of our amazing interviews with your favorite racers and industry icons.
I’ll see you guys next time!