Live Chat
Shark Demon 2 Plug & Play Installation Tips + Critical Safety Information
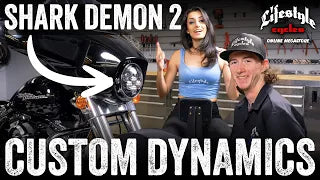
So today, we're going to install the Shark Demon 2 in our 2015 Street Glide.
All right, so what's super exciting about these headlights—my favorite part—is they're super easy to install. They're actually the closest installation you're going to get to the factory headlights, so you don't need a shop or anything. You can do them right at home! It even comes with a cool little sticker—pretty cool.
Also, with these headlights featuring ditch-to-ditch lighting, even when you're on the bike, you've got a full view of the road from one side to the other, with perfect focus right there in the middle of the road so you can see everything you need to see. Overall, awesome!
To touch base on that too, as you guys know, it's pretty risky—it’s high risk—having aftermarket or non-DOT headlights on your bike. These are not just LED and nice and bright, but they're also DOT approved, which has your back. And another thing that has your back? They have a lifetime warranty! That’s the greatest part of buying these—not just the warranty, but also customer service at all times of the day with the Lifestyle Cycles crew. We’re literally one phone call away.
On top of that, we’ve got a nice, pretty chrome replacement headlight bezel right here, plus the harness for the backlight switch on the headlight, with the color-changing and all that fun stuff. A nice, pretty headlight—so pretty! I'm so excited to get this installed. Look at that—just two plugs, and you're ready to go.
All right, so what time is it? Time to get dirty! Let's go.
Okay, Jared, what's our first step?
So, first thing we're going to do is get this seat off so we can get to the battery and get our connection hooked up.
Let's do it!
Okay, Jared, so we got the seat off. Tell me what to do next.
All right, so next, we’re going to start pulling that headlight out. Let's do it.
Get your handy-dandy Phillips. You’ve got one screw up here to take off, then hand your Phillips to your tool holder. Super easy! This slides right off, and then you're going to want to go back with your Allen key—but keep your Phillips around because you still have a couple more screws that are held in with the Phillips.
Another awesome thing about these headlights is they're engineered for Harley-Davidson. A lot of the other headlights on the market are either taken from off-road use or other industries and manipulated to go into Harley-Davidsons. But with the Custom Dynamics headlight, it's purpose-designed and built for your Harley.
Make sure when you're on that right screw, you hold on to the plastic piece so it doesn’t fall right out on you. Now that you've got your light out, it's super simple. You have one plug—you’re going to want to go ahead and unplug that. Then, ask your tool holder to grab you the new headlight.
Yeah, boy!
Now that we have the headlight out, we're going to pull out the headlight basket and replace it with the Custom Dynamics one.
Okay, so I was super excited and got a little ahead of myself. Jared, share with them what we need to do right before we put the new basket in.
All right, so before we put the new basket in, first, we're going to run our cable to the light through the frame of the bike. We’re going to run this down through real quick, then we'll get to the basket.
Yep! So to do this, I’ve got two really long zip ties, cut the ends off, and electrical-taped them together in the center. That worked perfectly for this.
All right, so once you've got your zip tie pulled through, take the end that's going to go to your headlight and electrical-tape that to the end of your zip tie. This is probably the easiest way to get it through without getting your wire stuck. By far, the easiest way! I've been doing audio for quite a while, and no matter what electrical work you need to run through the frame, the long zip tie trick is the way to go.
Now that Jared taped it up, I'm just going to go ahead and pull my zip tie through. Be very careful—don't force it. It should be very simple. Once you get it out on this side, carefully remove the electrical tape so you don't cut the wire. You can keep the zip tie around for your next project.
All right, I’ll be your tool holder now.
When putting the basket on, it's really important to make sure the bottom lip—where your screw is going to go into for your outer trim—is right there at the bottom. Then, just slide it on.
While Jared’s doing this, I want to dive into something important with you guys. It’s critical for Harley riders—or any rider—to understand that if you have aftermarket headlights that are super bright but not DOT approved, you’re at high risk. God forbid something happens—you don’t want to deal with that.
One amazing thing about Custom Dynamics is that they ensure their headlights are DOT approved. That’s for your safety in case of an accident. Plus, you don’t want to get pulled over.
Our Lifestyle Cycles team has a very close relationship with Custom Dynamics. One thing they’ve shared with us in depth—and something that makes us proud to represent them—is the fact that insurance companies, accidents, and even ticketing from cops are real-life issues people deal with when they have aftermarket headlights that aren't DOT approved. Unfortunately, a lot of people don’t realize that until they’re in the situation.
Custom Dynamics, on the other hand, cares about their customers, their safety, and their insurance and ticket rates. That’s why all their headlights are DOT approved.
So, Jared, what’s the next step?
All right, next step—we’re going to put our new headlight in with our nice new chrome trim and get it all put together.
The three tiny Phillips head screws are the last part for that. The Torx screws were used to put the bracket in.
Before screwing it in, make sure to plug in both the main wire I originally unplugged and the little red wire we ran through the bike. Also, as you see Jared tucking in those wires, make sure they’re in there so you're not pinching or cutting them when you screw your headlight in.
Jared is adjusting the bracket and headlight to find where it clips in. You don’t need to force these in—they’re super easy! Just find the sweet spot.
Another good tip—Jared is putting in his screws but not tightening them all the way. That’s because you want to make sure all three screws are in and lined up before tightening them. This keeps you from having a wonky headlight.
Now that our bracket is in, what’s next, Jared?
Before we get to that wire, let’s throw the chrome cover back on.
Let’s do it!
Now, can we install the red wire?
Yep, let's get the red wire in!
With the Shark Demon 2, you get a color-changing backlight. You also get a button to turn the backlight on and off. We found a good spot under the seat, but it’s up to you where you want to put it.
Now, let's get the wire hooked up to the positive terminal and turn this thing on.
All right, now we just need to put the tray back on. Sometimes, it can be a little tricky with all the wires down here, but remember—nothing needs to be forced! If you're forcing it, you're probably pinching a wire.
Okay, we got our positive terminal connected, all wires neatly in place, and the seat back on. Now what, Jared?
Now, we set our backlight color!
Take the included magnet and wave it over the sensor until you get the color you want.
No way—that magnet is changing colors? That’s insane!
Once you get your color, pull the magnet away, and your color is set!
Guys, I promise this was an easy install, and we proved you can do it right at home. It's DOT approved, has a lifetime warranty, and you can choose any color you want!
If you're looking for this headlight, check out the Lifestyle Cycles online mega store—order now for free shipping and 5% back in Mega Bucks!
Oh, and don’t forget to like and subscribe for more how-to videos, product reviews, and amazing interviews with your favorite racers and industry icons. See you next time!